Best Packing Tape For the Big Move

The Ultimate Guide to the Best Packing Tape for Every Need

When you’re boxing up your belongings, whether you’re moving to a new home, or organizing your storage unit, it’s easy to overlook one of the most important supplies: packing tape.

Sure, it’s not as exciting as picking out new labels or color-coding your boxes. But when your tape fails and a box bursts open mid-move, you’ll wish you had chosen more carefully.

So, what’s the best packing tape to get the job done right? Let’s break it down.

Why Packing Tape Quality Matters

It’s tempting to grab the cheapest tape you can find, but not all packing tape is the same. Low-quality tape can peel off easily, split when you try to apply it, or lose its stickiness when exposed to heat, cold, or humidity.

If you’re planning to store items long-term or ship boxes across the country, you’ll want a reliable tape that holds up under pressure. Literally. Plus, different tasks require different tape features. So, before you make a decision, you’ll also want to consider what your tape will need to handle. More on that in the next section!

Shipping vs Packing Tape Differences

Although packing and shipping tapes often look alike, they serve very different purposes. Here’s what you should know:

FeatureShipping TapePacking (Storage) Tape
ThicknessThinnerThicker
Adhesive TypeHot melt adhesiveAcrylic adhesive
Ideal UseMailing lightweight boxesLong-term storage and moving
Durability1-2 yearsUp to 10 years, even in fluctuating conditions

Shipping tape is ideal for mailing a small parcel, but it’s not built to hold up in the back of a moving truck or in a humid storage unit. For moving or storage, you want packing tape (also called storage tape), which holds up under pressure.

What to Look for in a Packing Tape

Let’s be real. Tape isn’t the most exciting part of moving or packing, But when it fails, you’ll wish you’d picked a better one. Whether you’re packing something fragile for storage or moving across the country, the right tape makes everything easier and less frustrating. Here are some features to consider when choosing a packing tape:

Strength and Strong Adhesion

You want tape that sticks—and stays stuck. Go for options labeled heavy duty or industrial strength labels, especially for full and heavy boxes. Tapes made from hot melt adhesive tend to hold better than basic acrylic alternatives, especially over time.

Also worth checking: tensile strength. That’s how much weight the tape can handle before snapping. If you’re packing books, kitchenware, or just cramming too much into one box (we’ve all been there), this matters.

Durability Over Time

Quality tape should be tough enough to handle the conditions of both moving and long-term storage. So, look for tape that’s:

  • Tear resistant: Holds up through dragging, stacking, and shuffling, which is essential for heavy boxes or rough handling;
  • Temperature resistance: Won’t peel off in the heat or freeze in the cold;
  • Moisture resistance: Great if you’re storing things in damp areas or moving during rainy weather.

Material, Thickness, and Size

Packing tape comes in various materials and thicknesses, usually from 1.9 to 3.1 mils. Thicker tapes are for the toughest jobs. If you’re dealing with heavier stuff or long-term storage, thicker tape is worth it. For lighter jobs, a thinner tape does the trick.

Make sure the tape roll is wide enough. 1.88 inches is standard for most boxes. And consider how much tape you’ll need. Longer rolls are more economical and reduce the need for frequent replacements.
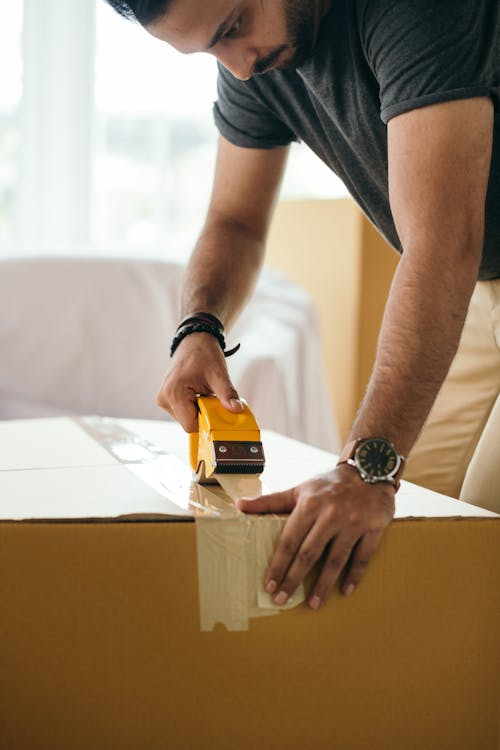
Ease of Use

A good rolling tape shouldn’t fight back. The best packing tapes unroll smoothly, work with handheld dispensers, and resist splitting or sticking to themselves.

To make packing quicker and less frustrating:

  • Choose a tape that unrolls evenly and fits a standard tape dispenser or gun.
  • Avoid overly thin tapes; they’re more likely to tear or fold.
  • Keep an extra roll and dispenser on hand to avoid delays when packing with someone else.

Other Types of Tapes (And When to Use Them)

Not all tape is created equal. When it comes to packing and moving, the type of tape you choose can make a big difference in how secure and durable your boxes are. Here’s a quick guide to different kinds of tapes and when you should use them.

Heavy-Duty Packing Tape

Heavy-duty packing tape is designed for tough jobs. It’s made with strong adhesive and typically features an acrylic formula that withstands temperature fluctuations and stress during transit and storage. This type of tape is ideal for sealing boxes that will be moved long distances or stored for an extended period. 

  • Best for: Long-term storage, extreme temperatures, heavy boxes

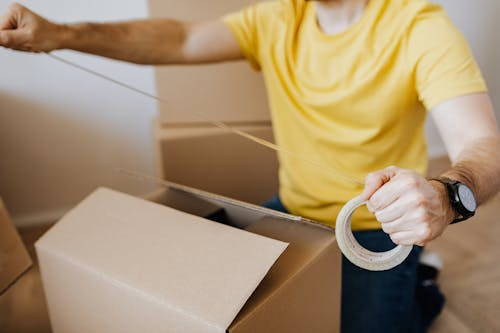
Filament Strapping Tape

Filament strapping tape is reinforced with fiberglass strands that provide extra strength, making it perfect for boxes that will be exposed to rough handling, extreme conditions, or a lot of movement. This tape is often used for sealing large or heavy boxes, as it can withstand a lot of weight and tension.

  • Best for: Heavy-duty boxes, rough handling during transport, items exposed to heat or cold

Gummed Paper Tape

Unlike standard adhesive tapes, gummed paper tape requires water to activate its adhesive, creating a very strong, permanent bond. It’s ideal for long-term storage, especially for boxes that will be exposed to extreme climates. The downside is that you need to wet the tape before use, which can be cumbersome. 

  • Best for: Heavy-duty storage, extreme temperatures, secure packaging that can’t be easily removed

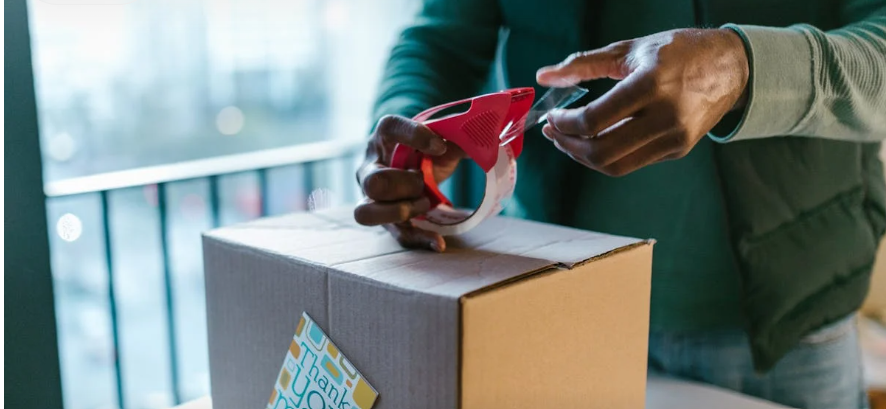
Labeled Tape (SmartMove, U-Haul EZ Read)

Labeled tape like SmartMove or U-Haul EZ Read, features printed room labels (e.g., “Kitchen,” “Bedroom”) directly on the tape itself. This type of tape lets you seal and label your boxes in one go, helping you stay organized throughout the moving process. It’s a time-saver when you need to quickly identify where each box should go. 

  • Best for: Labeling boxes for easy identification, moving with a large number of boxes, quick organization

Tapes to Avoid When Moving

While some tapes may seem like convenient options, they’re not ideal for packing and moving. For example:

  • Duct tape: While extremely versatile, duct tape doesn’t stick well to cardboard, leaves behind sticky residue, and weakens in extreme temperatures;
  • Brown paper tape: Not strong enough to handle the demands of moving, tears easily, and is not waterproof;
  • Masking tape: Weak adhesive and won’t hold up to movement or long-term storage;
  • Craft/Washi Tape: Decorative and not functional for packing;
  • Gaffer Tape: Expensive, not made for packing and moving boxes.

Final Thoughts

Investing in the best packing tape may not seem like a big deal… until you’re halfway through moving or storing and your boxes start falling apart. Choosing the right tape will help ensure your belongings stay safe, your boxes stay sealed, and your stress stays low. 

Don’t let little things like flimsy tape ruin your big move or storage project. For added peace of mind, check out My Storage Box for reliable storage solutions that keep your items secure long after the move is over. With the right tape and a little planning, you can make your next move a lot easier and less stressful! 

How to Use Self-Storage for Staging Your Home to Sell Effectively

Use Self-Storage to Help StageYour Home!

You’d be surprised at how much of a difference first impressions make when selling a home! One of the best ways to create that “love-at-first-sight” moment for potential buyers is through home staging. 

Home staging is about making the space feel desirable so that buyers can easily imagine themselves living there. And a key tool in this process is using a self-storage unit.

Self-storage allows you to clean out clutter, store personal items, and remove excess furniture, all of which allow the space to shine and make it easier for buyers to fall in love with the property.

If you’re in the process of selling your home and you want to increase your chances of a quick sale, you’re already on the right track by reading this article. 

We’re here to help you understand home staging better and how you use self-storage to do it right. Let’s dive in.

Why Home Staging Matters

Home staging is the process of preparing a property to appeal to the widest possible pool of buyers. It involves redecorating, rearranging furniture, deep cleaning, and sometimes even decluttering. 

The goal is to make your home as appealing as possible to potential buyers, so they can immediately see themselves living there.

Now, we’re sure your home is already beautiful as is. But here’s the thing: home staging is not about what you like. Your home is YOUR home, but when it’s on the market, it needs to feel like a place anyone could picture themselves calling home.

They need to be able to imagine their life unfolding within those walls. That means your personal touches, while meaningful to you, might not have the universal appeal that helps others connect with the space.

The reality is that buyers are more likely to fall in love with a property that feels spacious, light-filled, and well-maintained. Yes, that means no clutter and no things lying around the living room…

And let’s not forget; in a competitive market, staging can be the best way to get top dollar for your home.

How Self Storage Helps With Home Staging

Self-storage is a powerful tool for setting yourself up for success with home staging. It’s a small investment that can yield big results when it comes to impressing potential homebuyers and securing a great offer. Here’s how it can make a difference:

  • Declutter Without Stress: Clear out unnecessary items without the hassle of finding space at home, creating a calm and inviting atmosphere for buyers;
  • Store Personal Items for a Neutral Look: Remove personal mementos to create a neutral environment where buyers can envision themselves living;
  • Make Rooms Look Bigger: Open up cramped spaces by temporarily removing bulky furniture or items, making it feel spacious and functional;
  • Organize and Streamline Storage Areas: Tidy up closets, basements, and garages to show how much your house offers in terms of ample storage space;
  • Keep Your Home Show Ready: Stay prepared for showings at a moment’s notice by using self-storage to quickly stash away anything that’s out of place.

Ultimately, a storage unit lets you focus on the important task of staging and selling your home without worrying about where to store your belongings or if they’re safe.

Key Steps for Using Self Storage for Staging

To make the most out of self-storage and ensure your home staging is as effective as possible, follow these key steps:

Plan Ahead and Assess What Needs to Go

First, take a good look around your home and decide what can stay and what should be removed. Keep your goal in mind: creating a clean universally beautiful space. This means putting away your collection of family photos, that quirky painting you found on your vacation, bold decor choices, or anything that makes the place feel cluttered or overly personalized.

Make a list of everything that should be stored away and that can go into a storage unit. When placing them, think strategically. Organize them in a way that makes it easy to retrieve anything you might need later. Use sturdy boxes, label everything clearly, and store frequently accessed items near the front. If you’re storing furniture, consider using protective covers to prevent dust or scratches. Stack heavier items on the bottom and lighter ones on top to avoid damage.

Then, you can proceed to the next step of staging your home so that you can sell it for top dollar.

Prepare Your Home for Staging

Before you start staging, your house needs to be spotless. This step involves a deep clean (yes, those neglected corners, too), any minor repair you’ve been putting off, and of course, decluttering. 

Make necessary minor repairs such as fixing leaky faucets, touching up paint, and replacing outdated light fixtures. Declutter and depersonalize every room as much as you can to create a neutral but welcoming space.

If the process feels overwhelming, consider hiring a professional home stager for expert guidance. Do your best, and you’ll reap the benefits later when you have a quick and profitable sale on your house.

Stage With Purpose

Now comes the fun part—time to make your home shine and create that all-important “wow” factor! Staging with purpose means transforming each space to highlight its best features while making buyers feel at home the moment they step inside.

Since the goal is to help potential homebuyers envision themselves living there, focus on creating a warm, inviting atmosphere, especially in key areas like the living room and kitchen. These are the heart and soul of the home, where people gather, so you want to make them look functional but also stylish and spacious.

When it comes to the bedrooms, think warm and cozy. The right lighting, soft bedding, and a neutral color palette, can make the room look ideal for a restful night’s sleep. 

Additionally, consider staging the outdoor spaces, such as the patio or backyard, to make the home feel even more inviting.

Stage Your Home for Listing Photos

Your listing photos are the very first impression buyers will have of your home, so make them count. Aim for high-quality, well-lit photos. Capture your home from the right angles to highlight its space and features. And don’t hesitate to ask your realtors for assistance with real estate staging if needed. Sometimes professional stagers can help bring your vision to life and ensure your home looks its absolute best.

Before taking photos, make sure the home is clean and clutter-free. Even the most beautifully staged home can lose its appeal if there’s a visible mess all around. 

Use your self-storage unit to tuck away anything that doesn’t contribute to the overall aesthetics. Keep only the essentials in place to create a clean, open, and inviting space.

Avoid Common Mistakes in Home Staging

Home staging is simple but still some mistakes can happen when you’re doing it for the first time. To keep things running smoothly, be mindful of these common staging mistakes:

  • Less is more when it comes to decor. Over-accessorizing can make a space feel cramped and distracting;
  • Bright, bold colors might seem fun but they can be off-putting to some buyers. Stick to neutral colors that let the space speak for itself;
  • And please, keep the house clean and clutter-free before showings. Nothing says “this place is loved” like a well-maintained space;
  • Pro tip: Avoid using self-storage to store items that are essential to the staging process such as furniture that defines a room’s function, tasteful decor that enhances the space, or anything that makes the house feel warm.

Choose the Right Self Storage

Alright, we’ve reached the final step: choosing the right storage unit. It’s time to take that inventory list you’ve carefully made and find a place that works for both your stuff and your budget. 

You want a unit that fits everything comfortably, without being cramped or unnecessarily spacious. So, pick a unit size that makes sense for your needs. Too small, and you’ll run out of space. Too big, and you’ll pay extra money for space you don’t need. If you’re storing anything valuable, go for waterproof facilities to keep them safe. Remember that security is vital, so look for facilities with 24/7 surveillance and gated access.

To make things easier for yourself, choose a facility in a convenient location that’s close to your home. This will make dropping things off and picking up much simpler.

And when it comes to access, make sure it’s a facility where getting to your unit is hassle-free. No one wants to deal with parking and lugging things all over the place, right?

Ready to Rent a Storage Unit?

Now that you know how essential self-storage can be for home staging, it’s time to make it happen. It’s all about working with what you have in your house to present it in the best possible light. By thoughtfully arranging furniture, decluttering, and using self-storage to remove distraction, you’ll create a space that feels bigger, brighter, and more inviting.

Shipping containers lined up for use.

If you’re on the hunt for self-storage units in Ponca City, OK, My Storage Box is here to make life easier for you.

We offer affordable, secure, and easily accessible storage units to help you achieve the perfect staging setup. Our facility is fully fenced, gated, and features keypad access, so you can come and go with peace of mind, knowing your belongings are safe.

Have questions or ready to get started? We’re available 24/7, every day of the week. Reach out anytime, and we’d be happy to help you find the perfect storage solution!